Steps for Getting Started with Recruitment
Introduction
Recruitment refers to the process of identifying, attracting, interviewing, selecting and hiring employees.
SUB – MODULES
1) Dashboard
It represents the pictorial representation of the data based on the MRF created based on from and to date. It displays the details of candidates how many are appointed, how many have accepted the offer, etc.
2) Man Power Requisition form
It is used to add the complete details of the vacancies available in the organization.
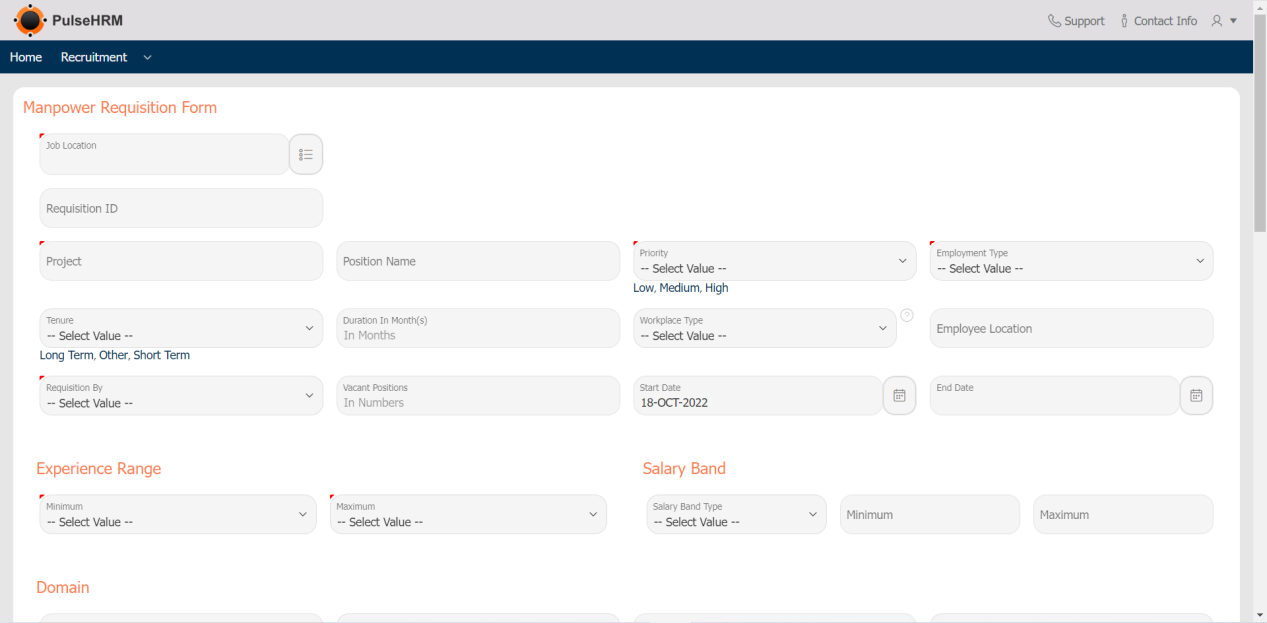
- Job Location: Select the Location for which the organization is hiring. For example Lucknow, Hyderabad, Delhi etc. The system will have a drop-down of cities.
- Requisition ID: Requisition ID is the unique ID given to each and every MRF. Requisition ID will generate automatically once you select the Job location.
- Project Name: Give the name of the project for which the positions are open.
- Position Name: Provide a position name for which hiring is going on.
- Priority Level: Select the Priority level of the MRF depending on the needs of the organization. There are three levels Low, medium, and low. There is a drop-down available.
- Employment Type: There are different kinds of employee work on different employment types For Example C2H, permanent, Full-time, Etc. Select the appropriate employment type.
- Tenure: Duration of a contract between Employee and Employer in terms of Long-term, short-term, and others. again you have a drop-down.
- Duration: The Duration of the Contract should get a specific number in terms of months. For example how many months the contract stands for
- Workplace Type: After covid-19 we all shifted towards remote work culture but slowly-slowly we again shifted our normal old work from the office paradigm, but still, there are openings for a different kind of workplace. Here there are three options in the drop-down Hybrid, onsite, and remote.
- Employee Location: Here the employee location needs to get filled.
- Requisition By: In this field, internal members of the organization will be the ones who propose the MRF.
- Vacant Positions: In this field, we have to mention the number of Positions that are open in the organization.
- Start Date: In this field, we have to mention the start date of the will be the date on which recruitment drive will start.
- End Date: It is the date on which the recruitment drive will get stopped.
- Experience Range: In this field, there are two drop-downs that show the Minimum and Maximum Experienced required for the position.
- Salary Band: Under Salary Band there will be a drop-down that shows whether the salary published for the Position is monthly or annually. Minimum and Maximum fields stand for the Minimum range of salary to the maximum salary that can be offered.
- Job Description: One of the most important aspects of any job opening. Here the word limit is 4000 (Four Thousand). There is also an option for uploading a Job description file from the HR/ employee Local drive. HR can customize the text, font, and mention numbers like Microsoft Word.
- Interview Panel: In this Option, HR can select different employees from different departments for different rounds of interviews along with their Email ID.
- Approver Details: Under this option, there are two sub-options of with approval and without approval. If we select approval then two fields will display the Approver Name drop-down and Status of MRF. After evaluating the MRF details Approver can approve it and also reject it.
If we select without approver, then Simply click on Submit and MRF will get generated.
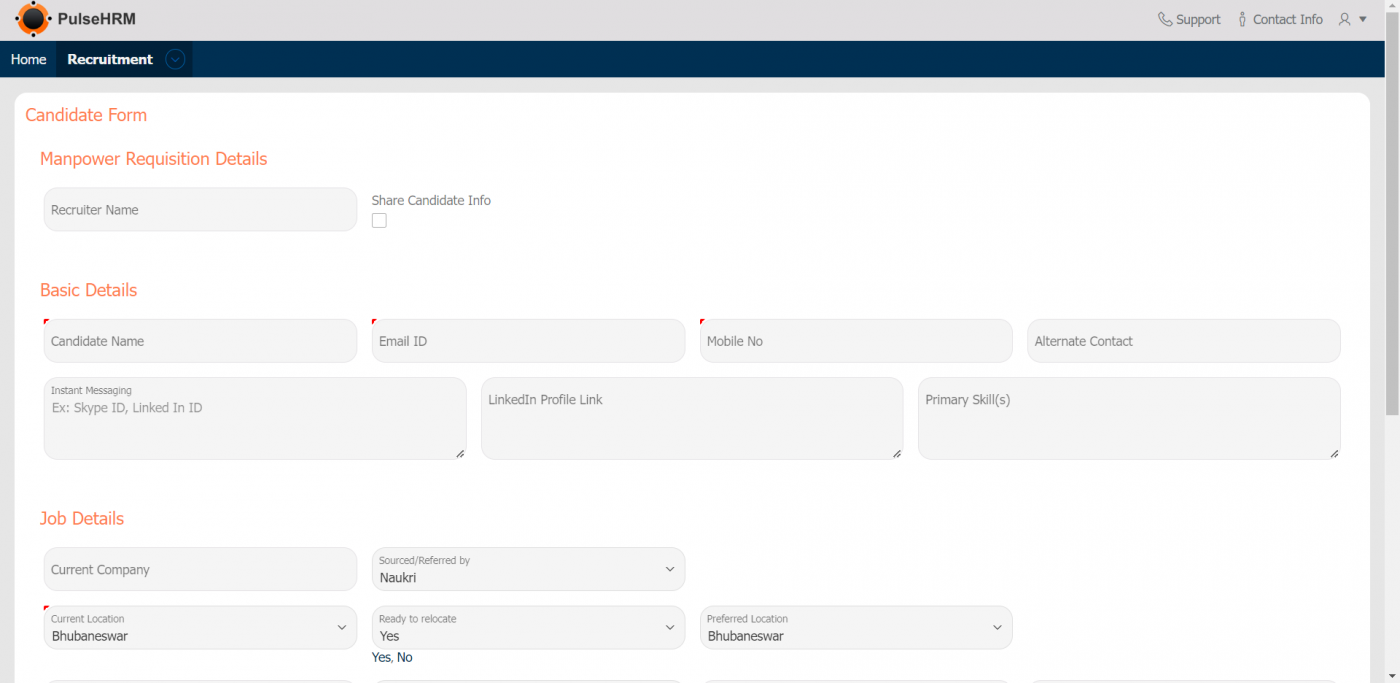
3) Add Candidate
The basic details of the shortlisted candidates are uploaded into the add candidate page based on the MRF they where selected, which is also needed to be mentioned.
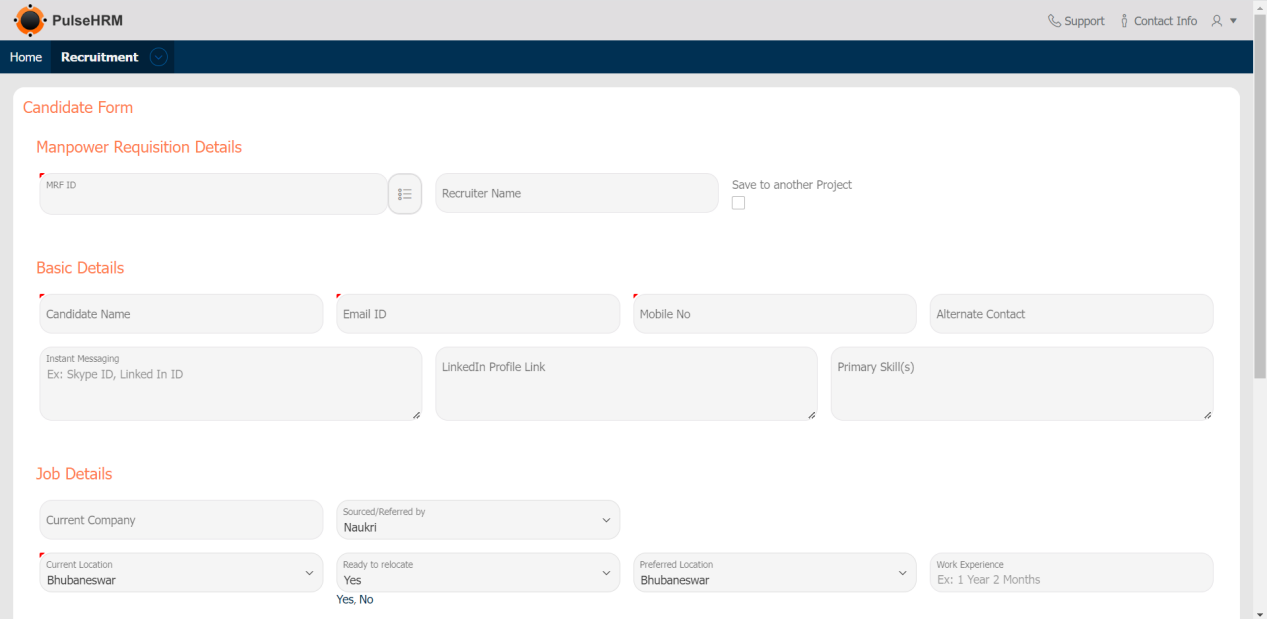
- Manpower Requisition Details: Select the MRF and mention the name of the recruiter. It can be saved for another project by clicking on the checkbox and a new drop-down will generate and there you can select the project.
- Basic Details: Here Candidate’s Name his/her Email ID, mobile number, alternative number, for instant messaging social media id can mention, LinkedIn Profile URL and Primary skills needs to fill.
- Current Company: The name of this field is self-explanatory, where the candidate is currently working.
- Sourced/Referred by: Under this module need to mention the job portal (for example Naukri, Job Monster and etc) or the internet site through which the company got to know about the candidate.
- Current Location: Here the current location of the candidate is mentioned.
- Ready to move: Under this option, we need to mention whether the candidate is ready to move for the job offered by the organization or not. Again via drop-down answer will be given.
- Preferred Location: The location in which the candidate is preferring to work
- Work Experience: The total work experience of the candidate have will be mentioned under this option. (For example, 1 year 2 months)
- Current CTC Amount: The current CTC of the employee will be mentioned under this field.
- Fixed CTC Amount: If a candidate’s monetary compensation is divided into two parts fixed and variable, then mention the fixed part of his salary.
- Variable Pay Amount: If a candidate’s monetary compensation is divided into two parts fixed and variable, then mention the variable part of his salary.
- Expected CTC: Under this field candidate’s expected CTC needs to mention on annual basis.
- Notice Period: According to the current company of the candidate, the duration of his/her notice period will be mentioned.
- If negotiable: If there is a possibility of negotiation with the current HR team of candidates then the reduced duration of the notice period needs to be mentioned.
- Currently serving Notice period: Under this option select YES if the candidate is serving the notice period and select NO if the candidate is not serving the notice period.
- Resume Upload: We can upload the candidate’s resume.
- Resume Received date: Receiving date of the resume of the candidate needs to mention.
- Resume Shortlisting date: The date on which the resume is shortlisted.
- Expected date of joining: When will the candidate joins the company needs to mention.
- Expected date of joining, Resume Received date, and Resume Shortlisting date while answering these field calendars will generate. After filling out all the options we can add additional comments and click on create.
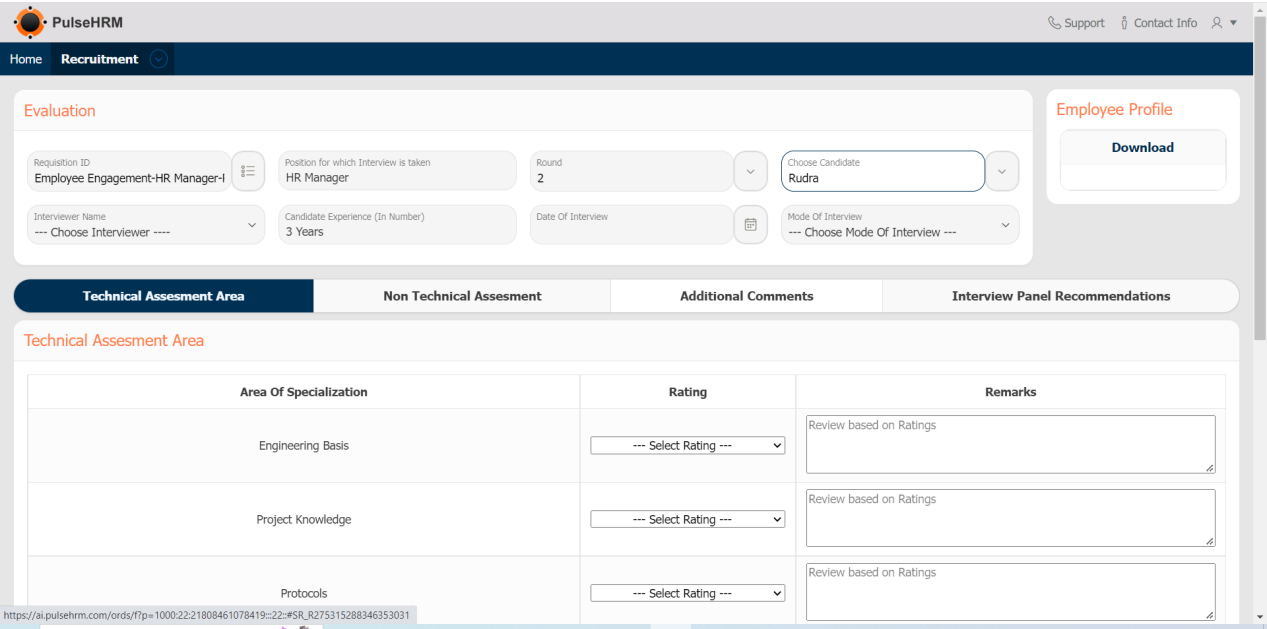
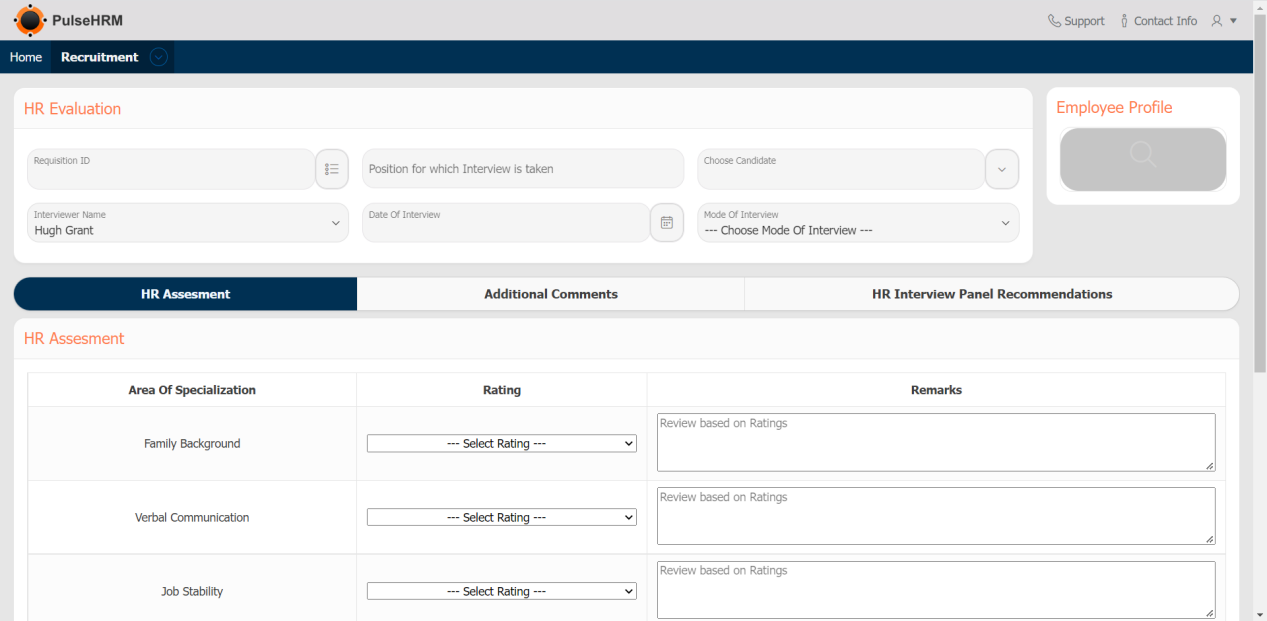
4) Evaluation
The Evaluation is used by the interviewer during the interview process to enter their feedback about the candidate. It is divided into 2 rounds – Technical & Non technical and HR Process.
The Technical & Non-Technical Evaluation
The HR Evaluation
5) Report
It displays the report of the vacancy in the organization, the candidate details added and the evaluation of both Technical and HR Process.
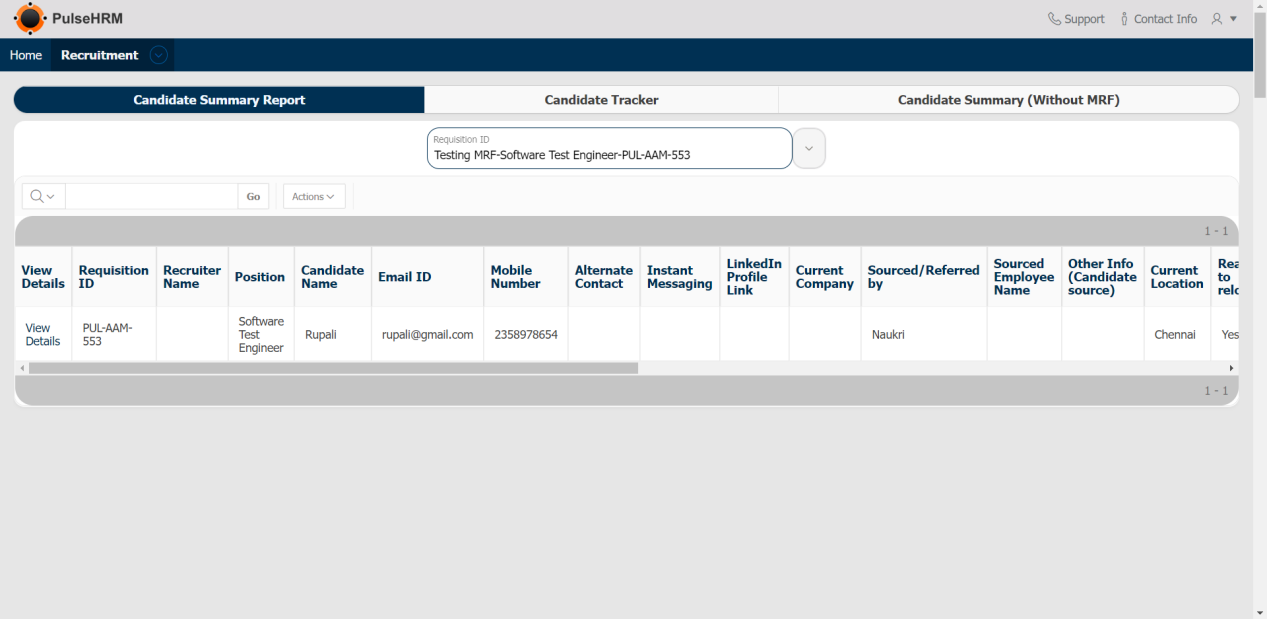
Candidate Report
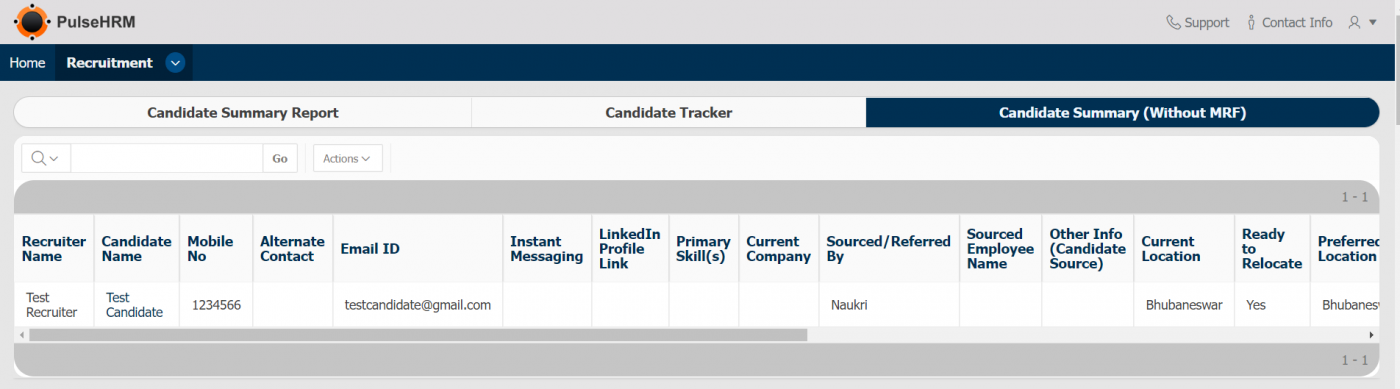
The Candidate report displays 3 reports: the candidates details according to the MRF.
The candidate details without the MRF and the Candidate tracker which displays the complete report of the particular candidate from the date of receiving the resume to the offer letter acceptance.
The Candidate Report with MRF
The basic details of the candidates who have been shortlisted for the particular position based on the MRF created can be saved.
The Candidate Tracker
The complete details of the employee like basic details, interview process and interviewer details, status and offer acceptance will be displayed.
The Candidate Summary without MRF
The basic details of the candidate who have been shortlisted for general position can be saved.
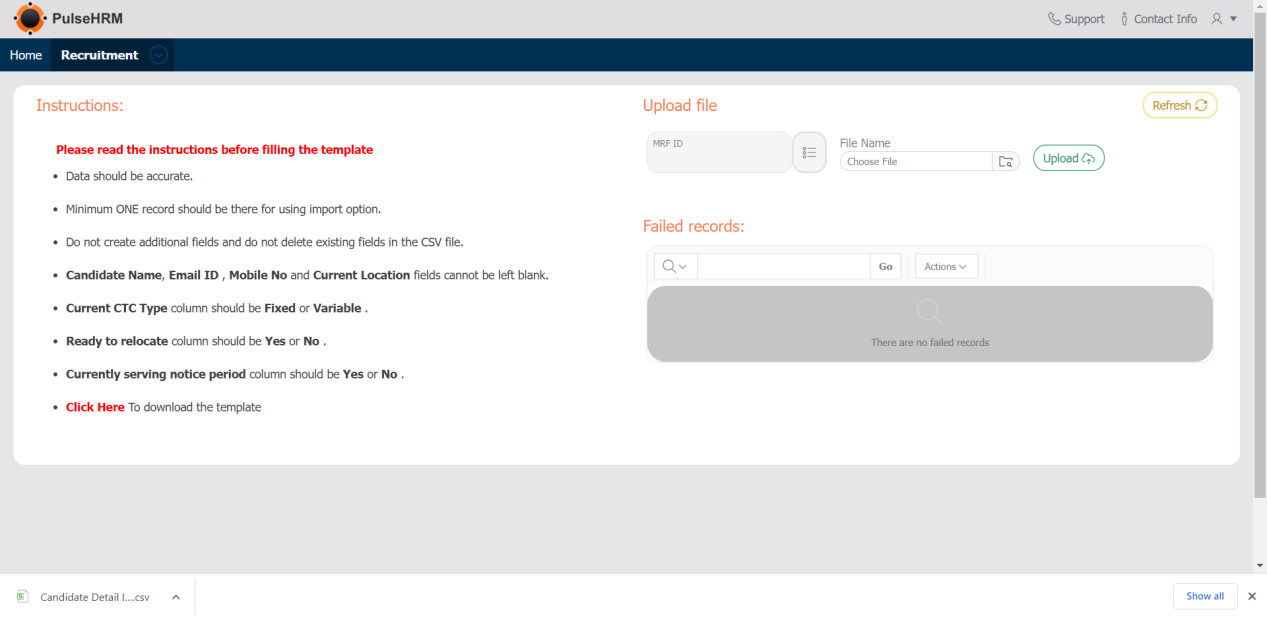
6) Candidate Bulk Import
If there are many number of shortlisted candidate whose data needs to be added into the portal then candidate bulk import can be used.
The template can be download -> data can be entered -> upload the file into the portal.
7) MRF Bulk Import
It is used to import bulk number of MRF into the portal using the template.
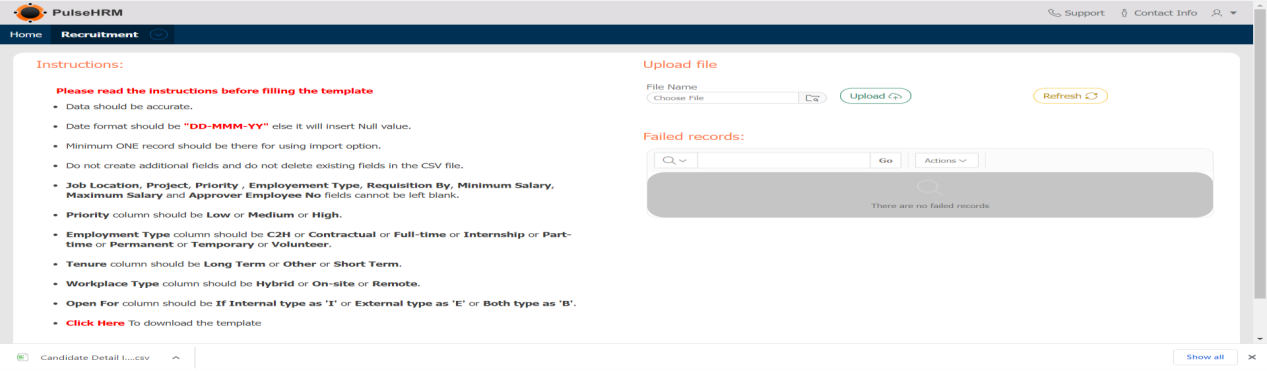
The template to import:

8) Email Configuration
It is used to mention the employee from the organization who should be notified when the MRF is created.

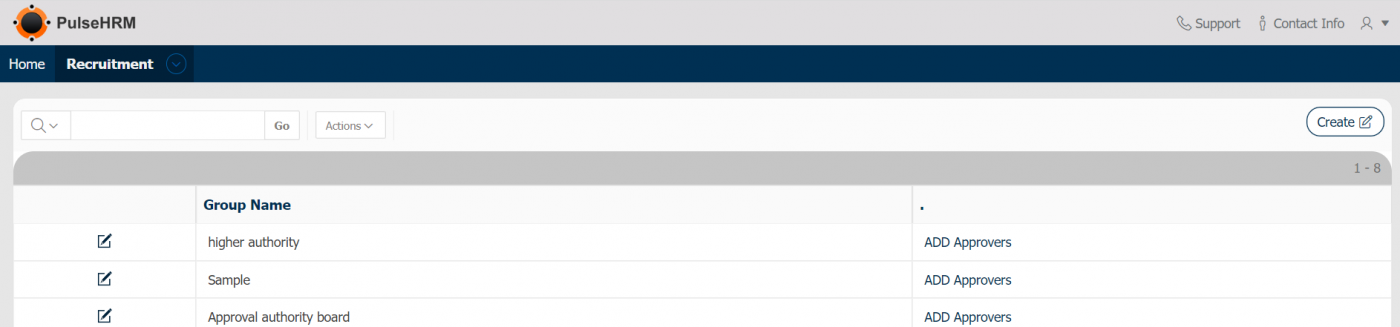
9) Approver Group
The Approver for the MRF can be created and the approver’s can also be assigned for the Group.
10) Add Candidate Without MRF
The basic details of the candidates shortlisted can be saved for the general position.