Steps for Getting Started with Time & Attendance
INTRODUCTION
Time and attendance module is used to track the employee working hours and his / her productivity.
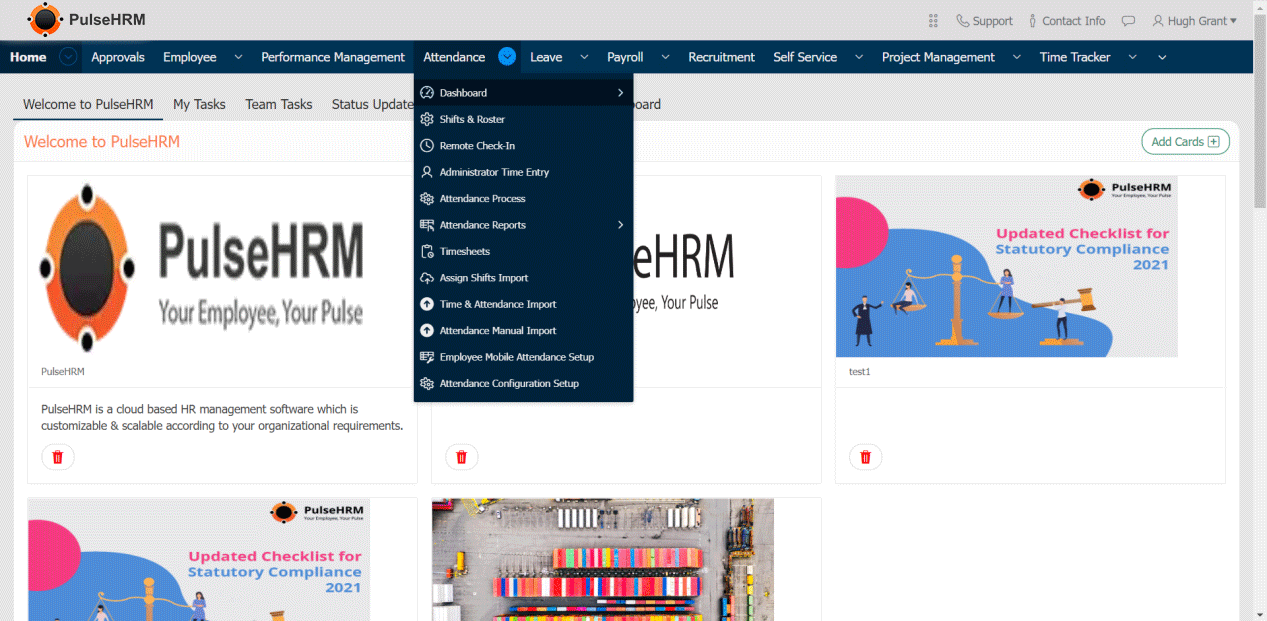
Time and attendance contains the below modules and sub modules:
- Shift and Roster
- Time Entry and Regularization
- Attendance Process
- Attendance Report
- Assign Shift Import
- Attendance Manual Import
- Employee Mobile Attendance Setup
- Dashboard
- QR Generator
1) Shift & Roster
Define Shift – The shift details which would include the start, end time, full day and half day along with break duration.
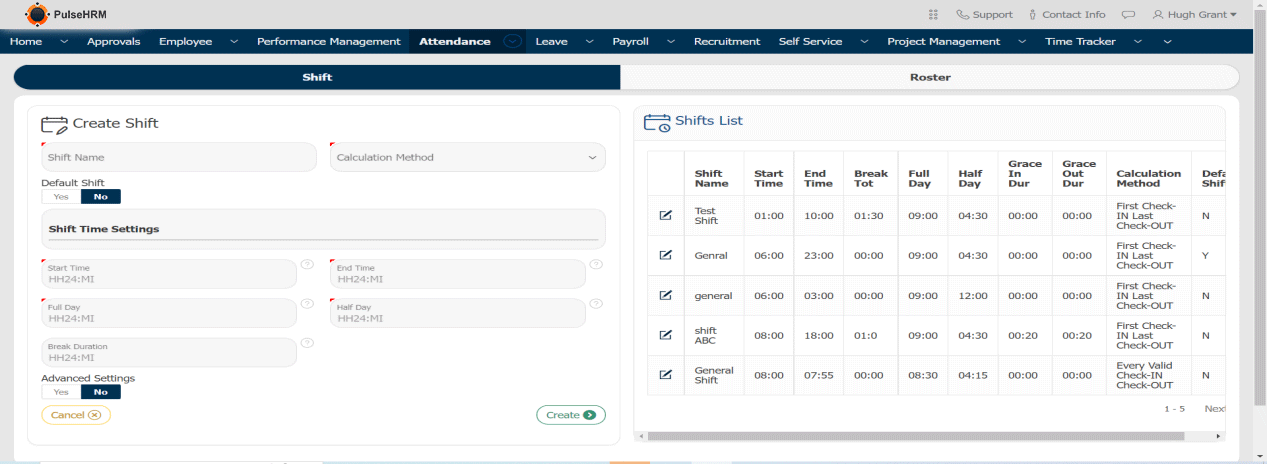
Create Roster – Roster is created in order to define and assign shift and weekoffs.
Below are the steps in order to create roster.
- Select “From Date and To Date”.
- Select employees / particular employee whose roster need to be created.
- Select weekoffs / shifts by clicking on “assign weekoff / assign shift “respectively.
- To view the roster you can select start and end date along with the employees.
- In order to view weekoffs for the same roster you can select start and end date along with the employees.

2) Time Entry & Regularization
In the Admin login, there are three sub modules
- Time Entry: Where the employee can punch in and out
- Admin Time Entry: The admin can punch in and out on behalf of the employee for the present date and past date
- Regularization: The employee can regularize his/her attendance

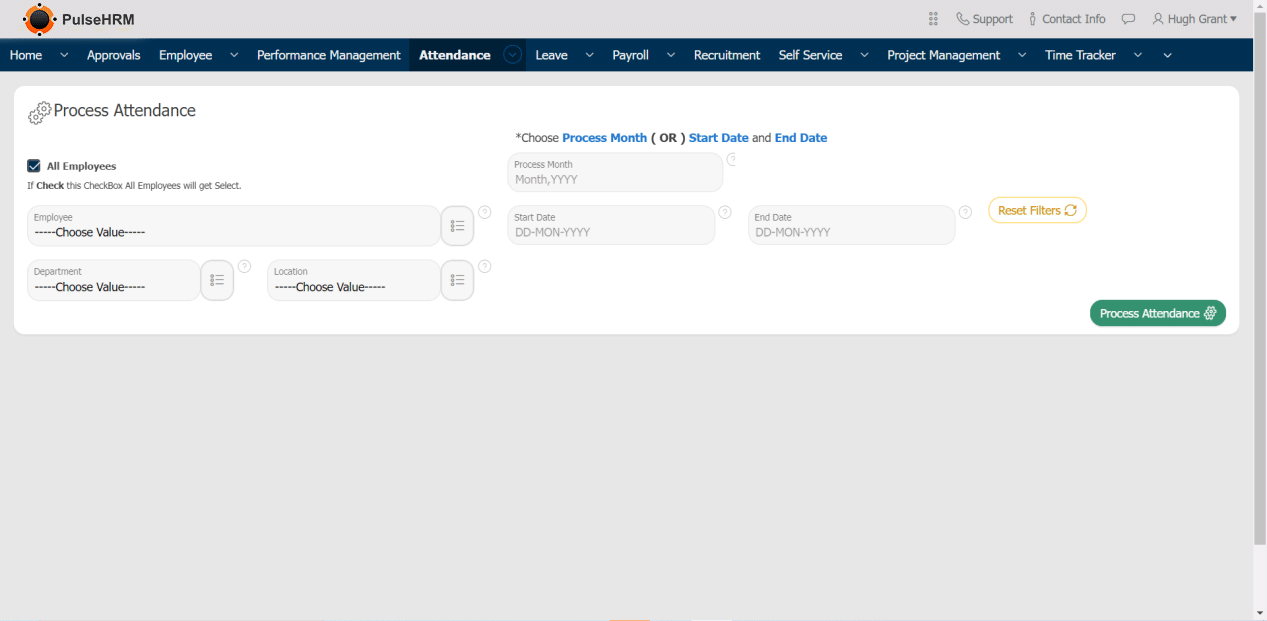
3) Attendance Process
Attendance can be processed based on criteria like date, month, department and location.
- Select the check box for the employees along with the month or the start & end date for which the attendance needs to be processed, so that the report will be generated.
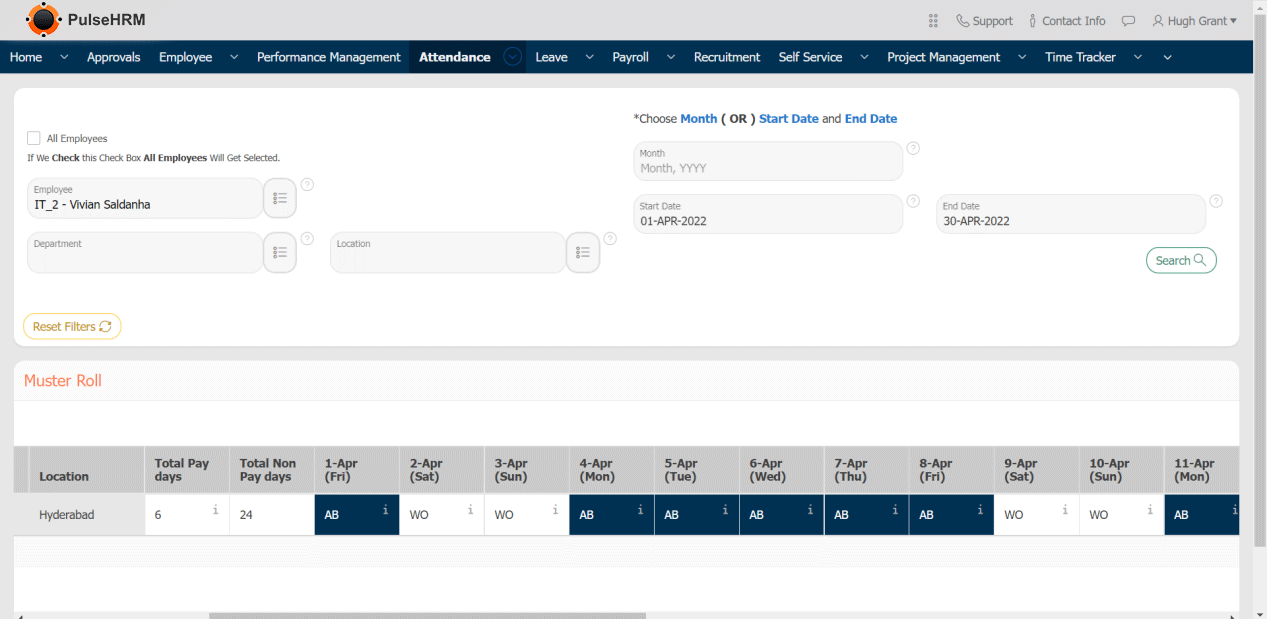
- All the paid / unpaid leaves, WO & PH, can be viewed with the help of muster roll.
4) Attendance Report
There are different types of reports that are generated.
They are:
- Muster Roll
The attendance details of the employee for the entire month day wise report will be available.
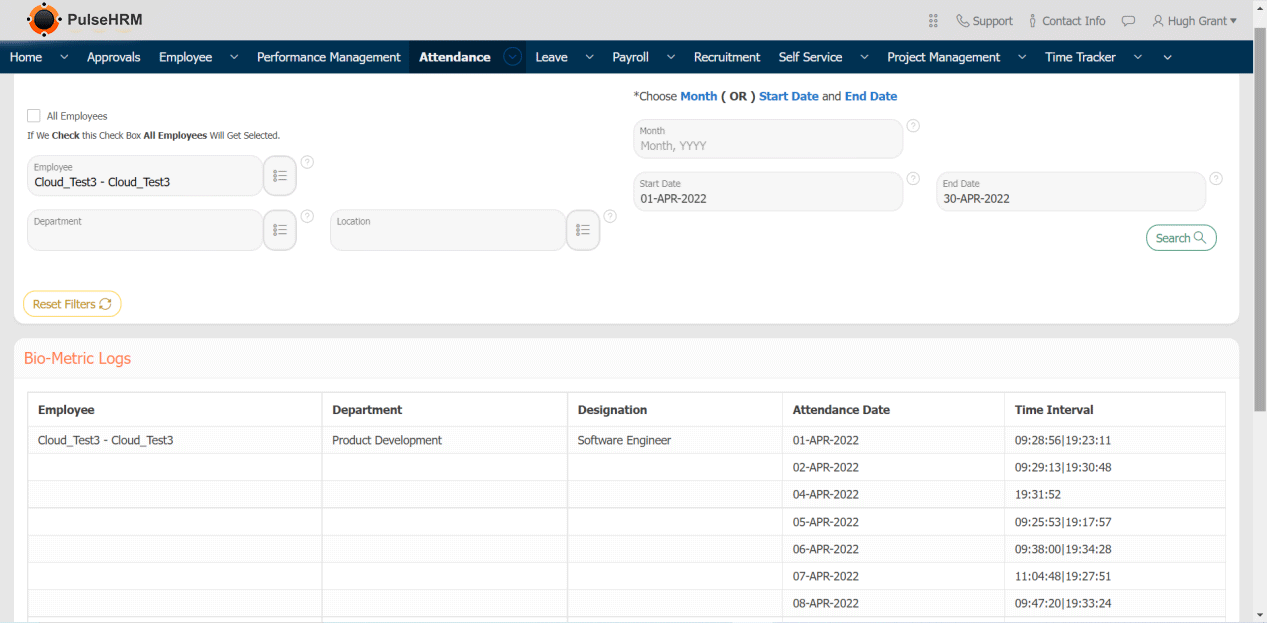
- Bio-Metric Logs
It provides the punch in and punch out time of the employee for every day of the month.
- Attendance Summary
Provides the complete summary of the month in numeric form.

- Shift & Attendance
It provides the details of the employees along with the shift assigned in detailed format.

- First Check-In Last Check-Out
It displays the first punch in of the day and the last punch out of the day made by the employees.

- Regularization
The report of the approved regularization request will be displayed.

- Location Tracking
PulseHRM provides an app which helps to punch in and out, apply for leave and view the attendance report.
This report helps to track the location from where the employee has done their punch in and punch out.
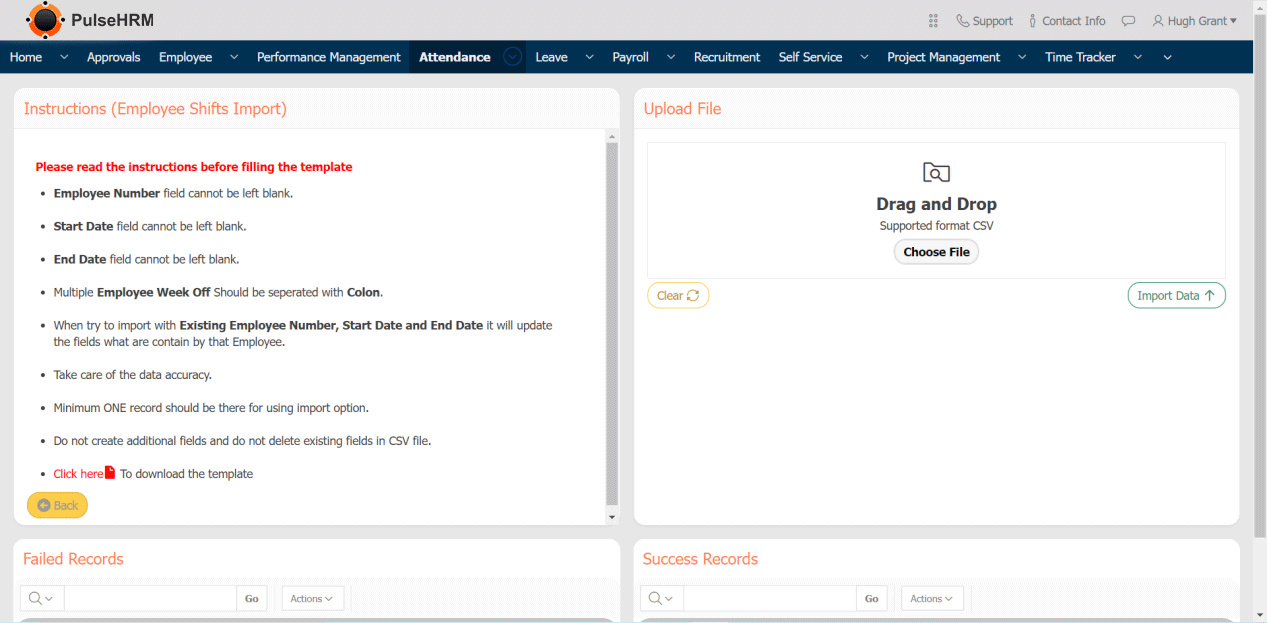
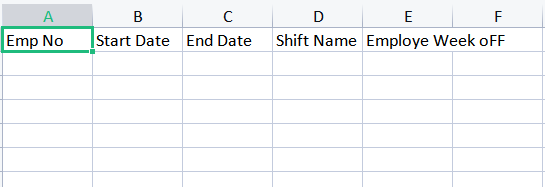
5) Assign Shift Import
The Shift details of the employees can be assigned in bulk with the help of the template available.
Note: The instruction needs to be followed like format, condition, etc.
The Template for Assigning shift
6) Attendance Manual Report
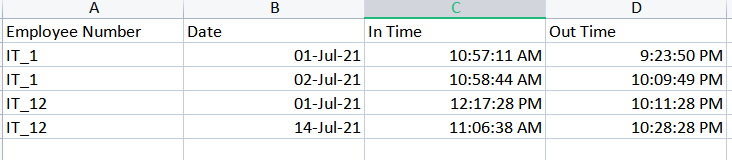
Import the logs of the employees without the device details. The logs will not be reflecting in the biometric report instead it will reflect in the muster roll report.
The template to import the attendance manual report.
7) Employee Mobile Attendance Setup
The Attendance setup whether the employee has to punch in and out with the help of location or QR code can be assigned manually for each and every employee. There is an import option to import the data into the portal in single click.
The template to import the data.

8) Status Update
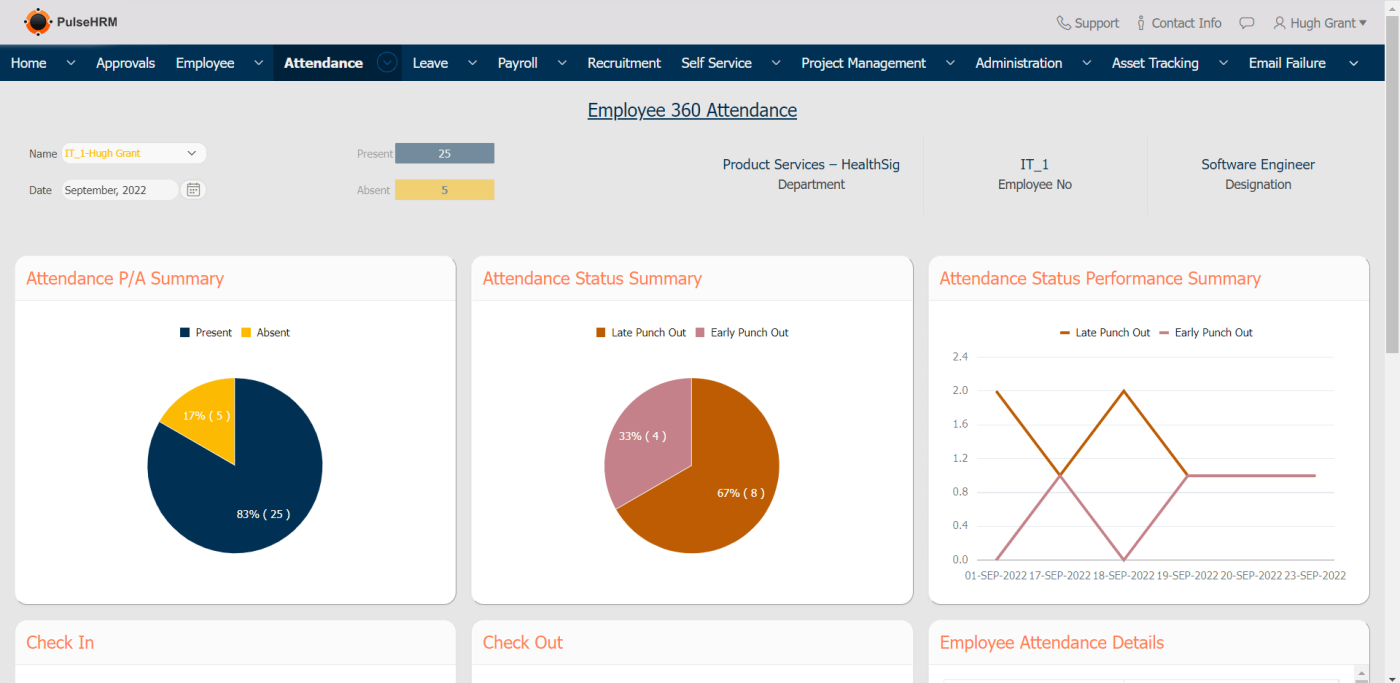
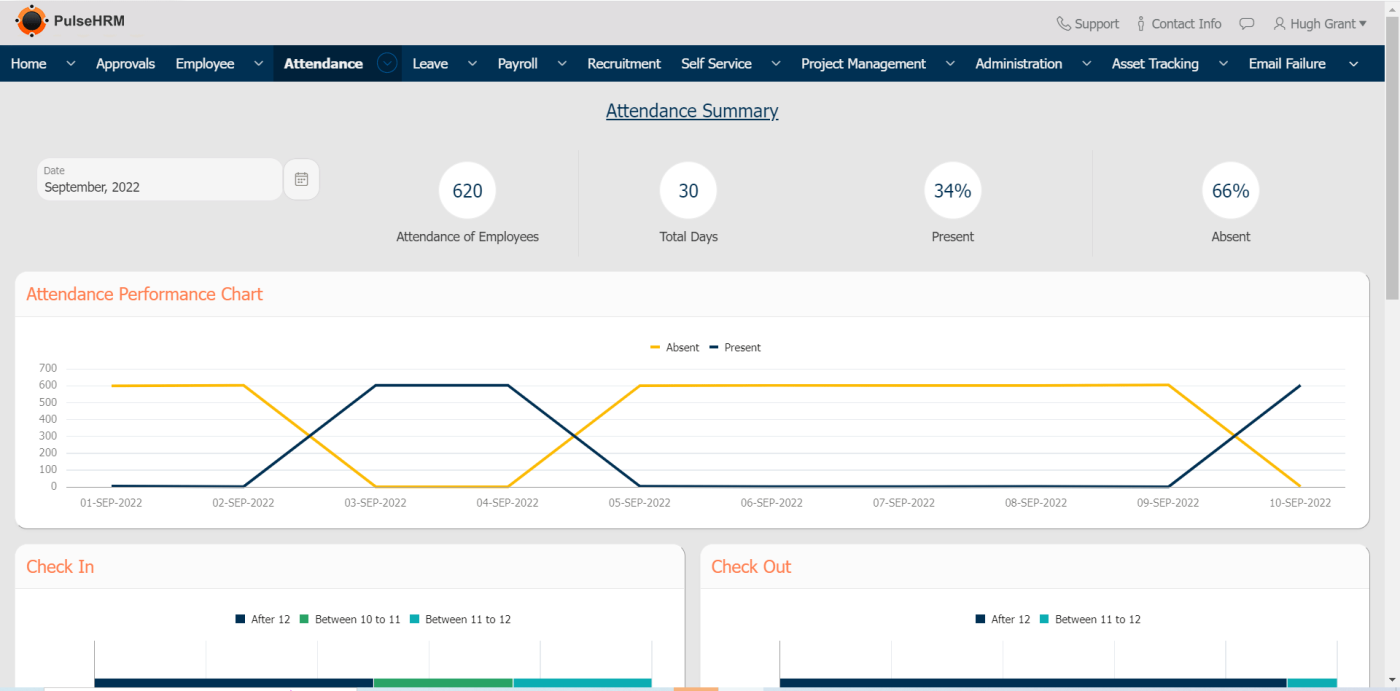
It displays the pictorial representation of the attendance. There are three types of dashboard
- Employee Dashboard
It displays the completes attendance details in a pictorial representation of a particular employee.
- Attendance Dashboard
Displays the summary of the employees, present employees and absent employees filtered by location and date.

- Employer Dashboard
It displays the attendance details in a pictorial representation of all the employees in the organization for the selected month.
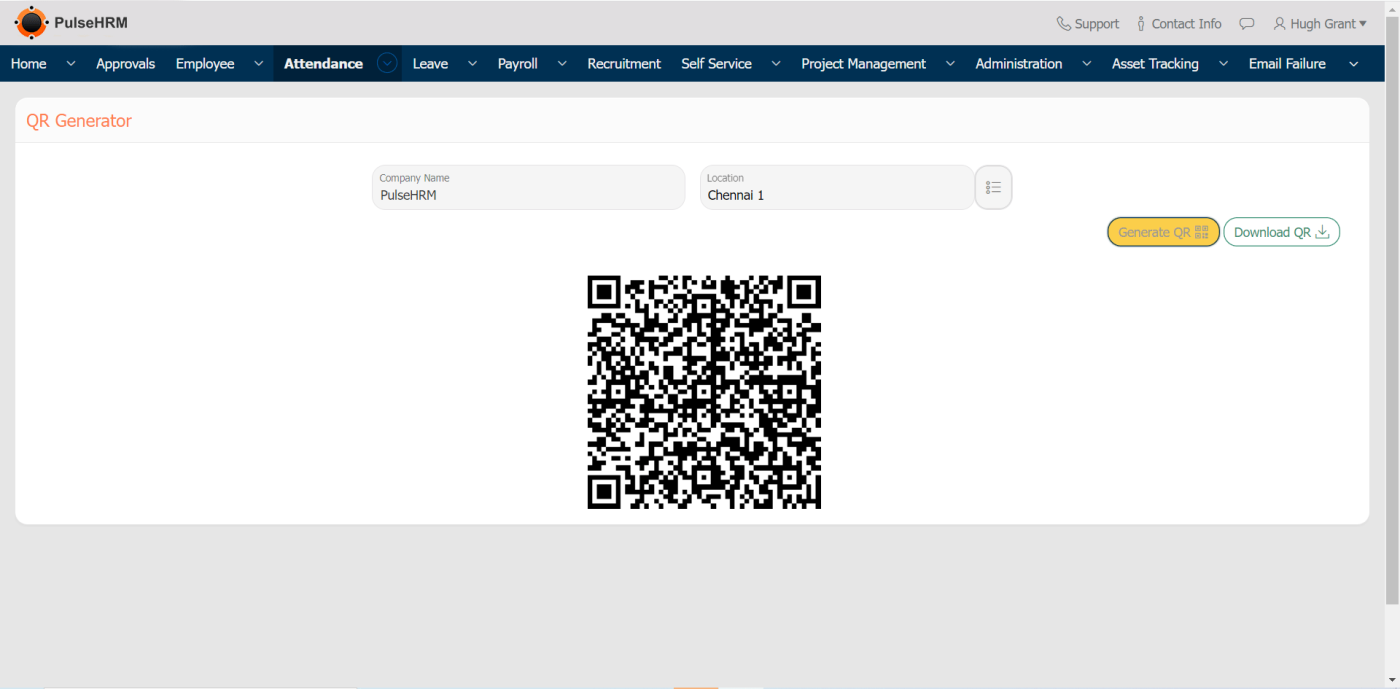
9) QR Generator
The employee can punch in and out using the QR code also. The admin can generate the QR Code and download the same based on the location. The QR Code downloaded can be placed at the entrance of the organization, so when the employee enters, they will have to scan the QR Code for punch-in and punch-out.